

How To Clean Axel Leak From Driveway
Our editors pick the products & services we write nigh. When you buy through our links, we may get a committee. Learn more.
In each vehicle, an beam seal is a part that seals the connection of a CV beam to the vehicle's transmission or rear differential. An axle seal'southward job is to forbid manual fluid or differential oil from leaking out.
Even so, axle seal leakage tin damage your vehicle, which can somewhen cost y'all a lot with your condom as one of the things at stake.
In this article, we will take a look at the symptoms, furnishings, and replacement of an axle seal leak.
Contents
- 1 What Is An Beam Seal?
- 2 Symptoms Of A Leaking Beam Seal
- 2.i Oil Spillage On Your Driveway
- 2.2 Dampness In The Expanse Of The Seal
- two.iii Unknown Fluid Below The Wheel
- 3 Causes Of A Leaking Axle Seal
- 4 Effects Of A Leaking Axle Seal
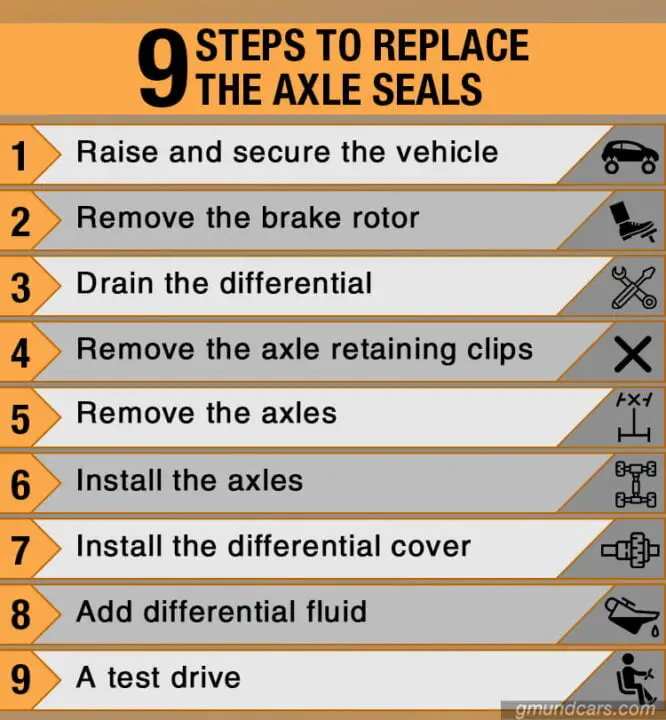
- 5 How To Replace The Beam Seals
- 5.one Stride 1: Raise and secure the vehicle
- 5.2 Stride 2: Remove the brake rotor
- 5.3 Footstep 3: Drain the differential
- five.4 Step 4: Remove the axle retaining clips
- 5.5 Step 5: Remove the axles
- 5.vi Stride 6: Install the axles
- five.7 Step 7: Install the differential cover
- 5.8 Step 8: Add differential fluid
- 5.9 Footstep 9: A examination bulldoze
- vi Conclusion
- 7 FAQs
- 7.1 Is it condom to drive with a leaking axle seal?
- seven.ii How much does information technology cost to supersede the axle seal?
- 7.3 Should both axle seals (left and correct) be replaced at the same time?
What Is An Beam Seal?
Credit: atpautomotive.com
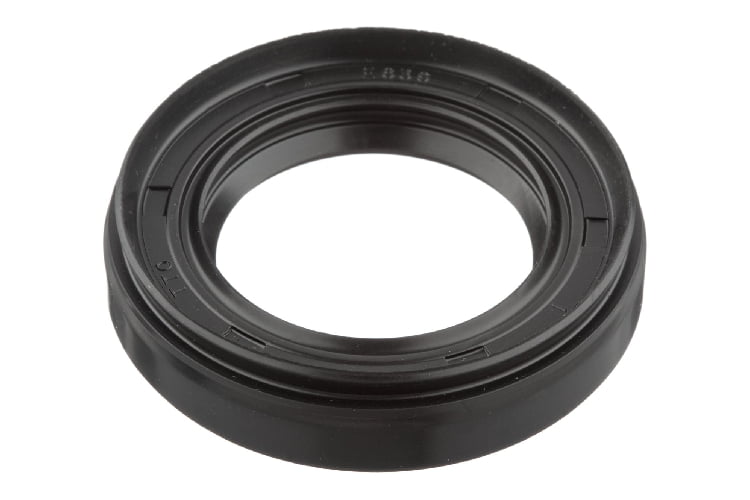
The axle seal is an chemical element or function of the vehicle that helps seal the connection of a drive shaft (CV axle) to the rear differential or manual.
In a few all-bicycle-drive automobiles, either of the CV axles at the front end connects to a transfer example, and that's why it'due south occasionally chosen: "transfer case seal".
Functions
- Forbid the differential oil or transmission fluid from leaking out.
- Keep lubricants abroad from the beam environment.
- Allow the axle to rotate freely.
- Forestall debris, dust, and water from inbound the installation.
Symptoms Of A Leaking Beam Seal
An beam is an essential part of the vehicle that can create a slew of problems with your transmission organisation when it fails. Here are a few alarm symptoms you lot should be on a lookout for:
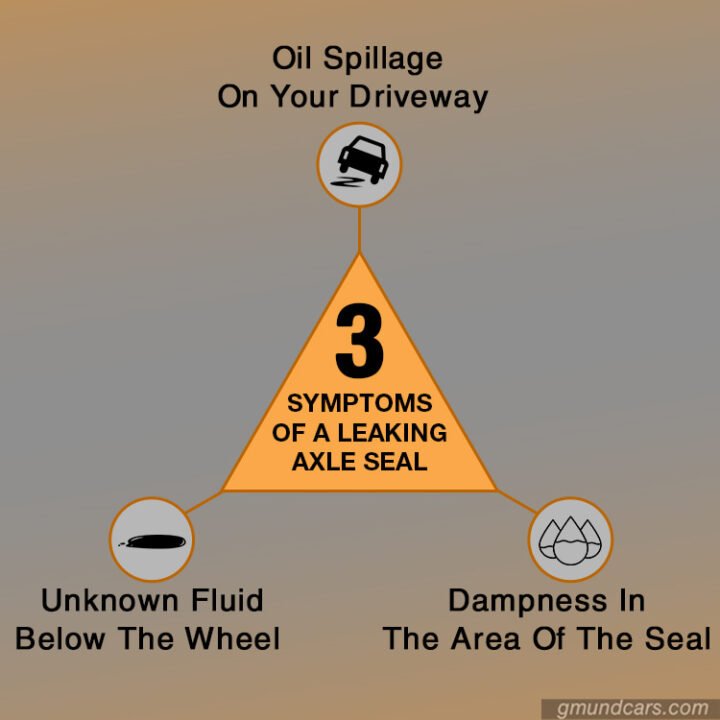
Oil Spillage On Your Driveway
1 of the start indicators of an axle seal leak is pools of oil under the car. Oil tends to spill out as the seal rips and splits, and this is usually obvious after the vehicle is stationary for a few hours on the driveway.
Dampness In The Expanse Of The Seal
A moist surface area surrounding the seal is another symptom of an axle seal leak. When leaking fluid makes its fashion into the exhaust system, information technology can cause a called-for odor when the exhaust is hot.
The leak could also contaminate your brake shoes, resulting in strange noises and a reduction in braking power. As such, it'due south best to cheque the area surrounding the seal regularly.
Unknown Fluid Beneath The Wheel
Another sign of an axle seal leakage is when a carmine-brown fluid starts dropping backside the front left wheel that attaches the driveshaft to the transmission.
Equally the fluid keeps leaking, the transmission fluid level drops, and transmission begins to slip. So while an oil stain in the driveway is a common symptom, it does non always occur because the axle seal leaks more than when driving on the highway.
Read more: CV Beam Boot: Overview, Signs, And Replacement
Causes Of A Leaking Axle Seal
The primary cause of a leaking axle is an improper installation or poor maintenance of an axle seal. However, the axle seal can vesture out or get damaged over time, and this can cause it to leak. So it is best to check and replace the beam seal when damaged.
Effects Of A Leaking Beam Seal
Credit: youtube.com
The upshot of an beam seal that's leaking varies depending on the level of leakage.
If big amounts of fluid leak away, the leaking part (transfer, transmission, or differential unit) may worsen. If it is a minor or fiddling leak, and repair is impossible at the moment, you may exist able to drive it for the time existence as long as you are topping up the differential oil or transmission fluid.
When you fail to proceed up with its regular maintenance, the bearings and gears will somewhen clothing out, and the beam will stop working completely, potentially while driving at loftier speeds. As a result, yous might probably lose control of the vehicle and crash, possibly injuring or killing someone.
The axle seal should be repaired as soon as possible since the fluid tin can harm restriction components because it is not appropriate to drive with a leaky axle seal for your safety. Nevertheless, to go along your gearbox working smoothly, you must make sure the fluid in it is full.

National Oil Seals 710685 Axle Shaft Seal
Read more: Front Axle Of A Car: Types, Functions, And Replacement
How To Replace The Axle Seals
The axle seals will neglect when a visible leak or a large puddle of gear oil forms beneath the car. And this might cause a lot of astringent impairment like brake failure, saturated brake pads, and shoes.
Also, in severe circumstances, an axle leak might cause serious damage to the differential ring and pinion as well as the bearing assemblies, perchance destroying the entire back axle.
So before you begin to experience this, information technology is always recommended to replace both seals in the dorsum axle. When replacing beam seals, y'all must access the differential housing in the rear axle and remove the axle shafts. You can remove both axle shafts simultaneously while removing the axle seals.
Tools needed in replacing the axle seals:
- Brake cleaner
- Hydraulic jack
- Differential fluid
- Plywood
- Hammer
- Ratchet
- Scraper
Beneath is a step guide on how you can replace your axle seal:
Footstep 1: Raise and secure the vehicle
Put your wheel chocks in forepart and behind either of your front end tires to secure your vehicle; information technology will hinder the auto from moving.
Next, lift your vehicle by placing your hydraulic jack at the lifting locations specified in the owner'south manual for your car. It will be easier to remove when the axle has support from the jack stands.
Lift the axle high enough to raise the bike off the ground, and place a jack stand on both sides underneath the vehicle and plywood. Release the hydraulic jack locking mechanism on the handle to elevator the car.
Set the vehicle's gears to neutral then, remove the bike bolts, then the vehicle's bike.
Step two: Remove the brake rotor
To detach the brake rotor, remove the wheels, then remove the brake caliper from the vehicles using a ratchet.
The brake caliper is the component that holds the restriction pads in identify and delivers pressure to finish the vehicle. So, you must remove it first. Also, you should notation that some restriction calipers come with brackets, and the number of brackets a restriction caliper has depends on the type of automobile.
One time you have removed the brake caliper, slide the restriction rotor direct off the axle flange (the surface your wheel mounts to) and expose the entire flange if you lot don't have a brake caliper bracket.
Loose the two mounting bolts that secure the brake caliper bracket if your car has one, afterwards which you can remove the brake caliper rotor.
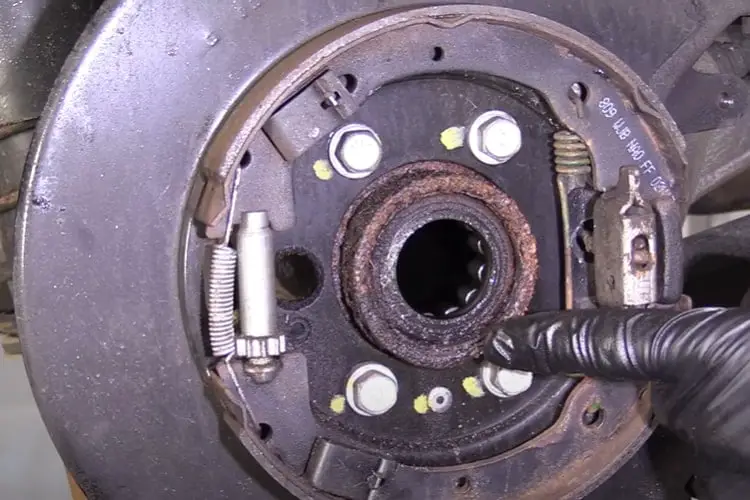
Annotation: The axle flange shows when you lot remove the brake rotor.
Step 3: Bleed the differential
To drain the differential, you must first remove the bolts for mounting; it helps to empty the differential.
Then identify the drain pan under the differential to drain all the liquid. Scrape between the differential cover and the axle house with your scraper to separate the differential cover from the vehicle. Remove the last bolt and identify the comprehend and mounting bolts aside.
Step 4: Remove the axle retaining clips
To detach the axle retaining clips, you lot must rotate the driveline that goes into the differential and closely spotter the pinion and differential ring every bit it rotates until you see a small retaining bolt used to hold a long pivot in the middle of the spider gears.
When yous have done this, identify the carrier in a mode that will permit you to pull out the big pin without rotating the axle.
Remove the retaining and mounting bolts but salvage i at the peak of the differential cover to empty the differential and push the large pin out of the axle. So, get ahead to take out the differential cover from the vehicle.
Step 5: Remove the axles
Use the seal puller to hook the inner office of the seal. So, slowly and steadily, button the pry until the seal begins to lift out. And so, pull or push, depending on your electric current position.
Altogether remove the seal and utilise the brake cleaner to clean the inside of the axle tube and wipe off the area to place the seal. Then, accept the new seal and look for the right installation tool.
Begin to install information technology gently. Then, with the seal in the proper location, tap information technology into place with a hammer until the beam housing is affluent and flat.
After you've installed the seal, rub some differential fluid effectually the inside using your fingertips. Then, echo the same process on the other side.
Step 6: Install the axles
To install the axles, yous must gently put the beam stop into the seal without pinching it, and once the axle is fully seated in the seal, check that the sealed package is not rolled up or broken.
And then slide the axle over the stop of the axle slot and button out the axle shaft. After the axles take been mounted and secured, slip the carrier pin into the carrier assembly.
Step vii: Install the differential encompass
Using a scraper, clear the surface of the old silicone from the comprehend and differential housing by removing all dirt. And then, use the brake cleaner to wipe the mating surfaces of the differential cover and beam housing.
Now, place the differential cover on the beam with the mounting bolts bachelor. Concord the lid in one hand while threading the bolts with the other and use the torque to the mounting bolts.
Footstep viii: Add differential fluid
Remove the fill plug from the right or left side of the differential housing, depending on its side. It may be hard to find in some instances, and so you may need to scrape off old grease or mud to run across it.
After this, cheque the amount of differential fluid you need to fill the differential housing in the possessor's guide, and so go ahead to fill information technology. However, while filling, you should ensure you experience the oil level with your finger to avoid overfilling that might outcome in leaks.
Also, the brake parts must be replaced. And to replace information technology, y'all might need to use a C-clamp to compress the caliper if it doesn't go over the rotor when mounted. Tighten the brake caliper mounting nuts according to the manufacturer'southward torque guidelines.
Put the wheels on, then apply the parking restriction on the car afterwards locking the back wheels. It volition gradually help you tighten the nuts on your bike before returning the vehicle to the basis.
Pace 9: A test drive
After completing all necessary steps to a higher place, test-drive your vehicle for a short trip. This volition assistance in the catamenia of differential fluid through the axle.
The examination drive should exist carried out with proper attending to the vehicle in case at that place'due south still any leakage. If none, then all is almost set.
Subsequently the test bulldoze, remove the make full plug on the differential to verify the fluid. Then, check the level with your finger and add the desired quantity if low.
Read more: Broken Axle: Signs And Causes
Decision
The axle seals go along the differential fluid while keeping dirt, dust, and water out. Once polluted, it tin quickly deteriorate fluid, causing bearings, seals, and even of import components such equally the ring and pinion to neglect. Monitor your axles to save yourself from unexpected damage and extend your vehicle'south life.
FAQs
Is it prophylactic to bulldoze with a leaking axle seal?
It is possible to drive with an axle seal leakage for a curt time if the leak is small in size.
How much does information technology cost to supersede the axle seal?
Depending on the type and model of your auto, the price of replacing axle seals is from $150 – $600. It's essential to seek a solution for a leak sooner rather than later if you notice one, every bit destroying your transmission is an expensive repair.
Should both axle seals (left and right) be replaced at the same fourth dimension?
No, repairing both axles at the same time is unnecessary. If 1 axle seal fails, it does non necessarily signify that the other will fail soon.

Source: https://gmundcars.com/axle-seal-leak/
Posted by: carmichaelshad1981.blogspot.com
0 Response to "How To Clean Axel Leak From Driveway"
Post a Comment